Recording a Local Vendor Bill
This guide covers how to record a local (PHP) vendor bill, including withholding tax and posting.
Navigate to Vendor Bills
Vendors > Bills
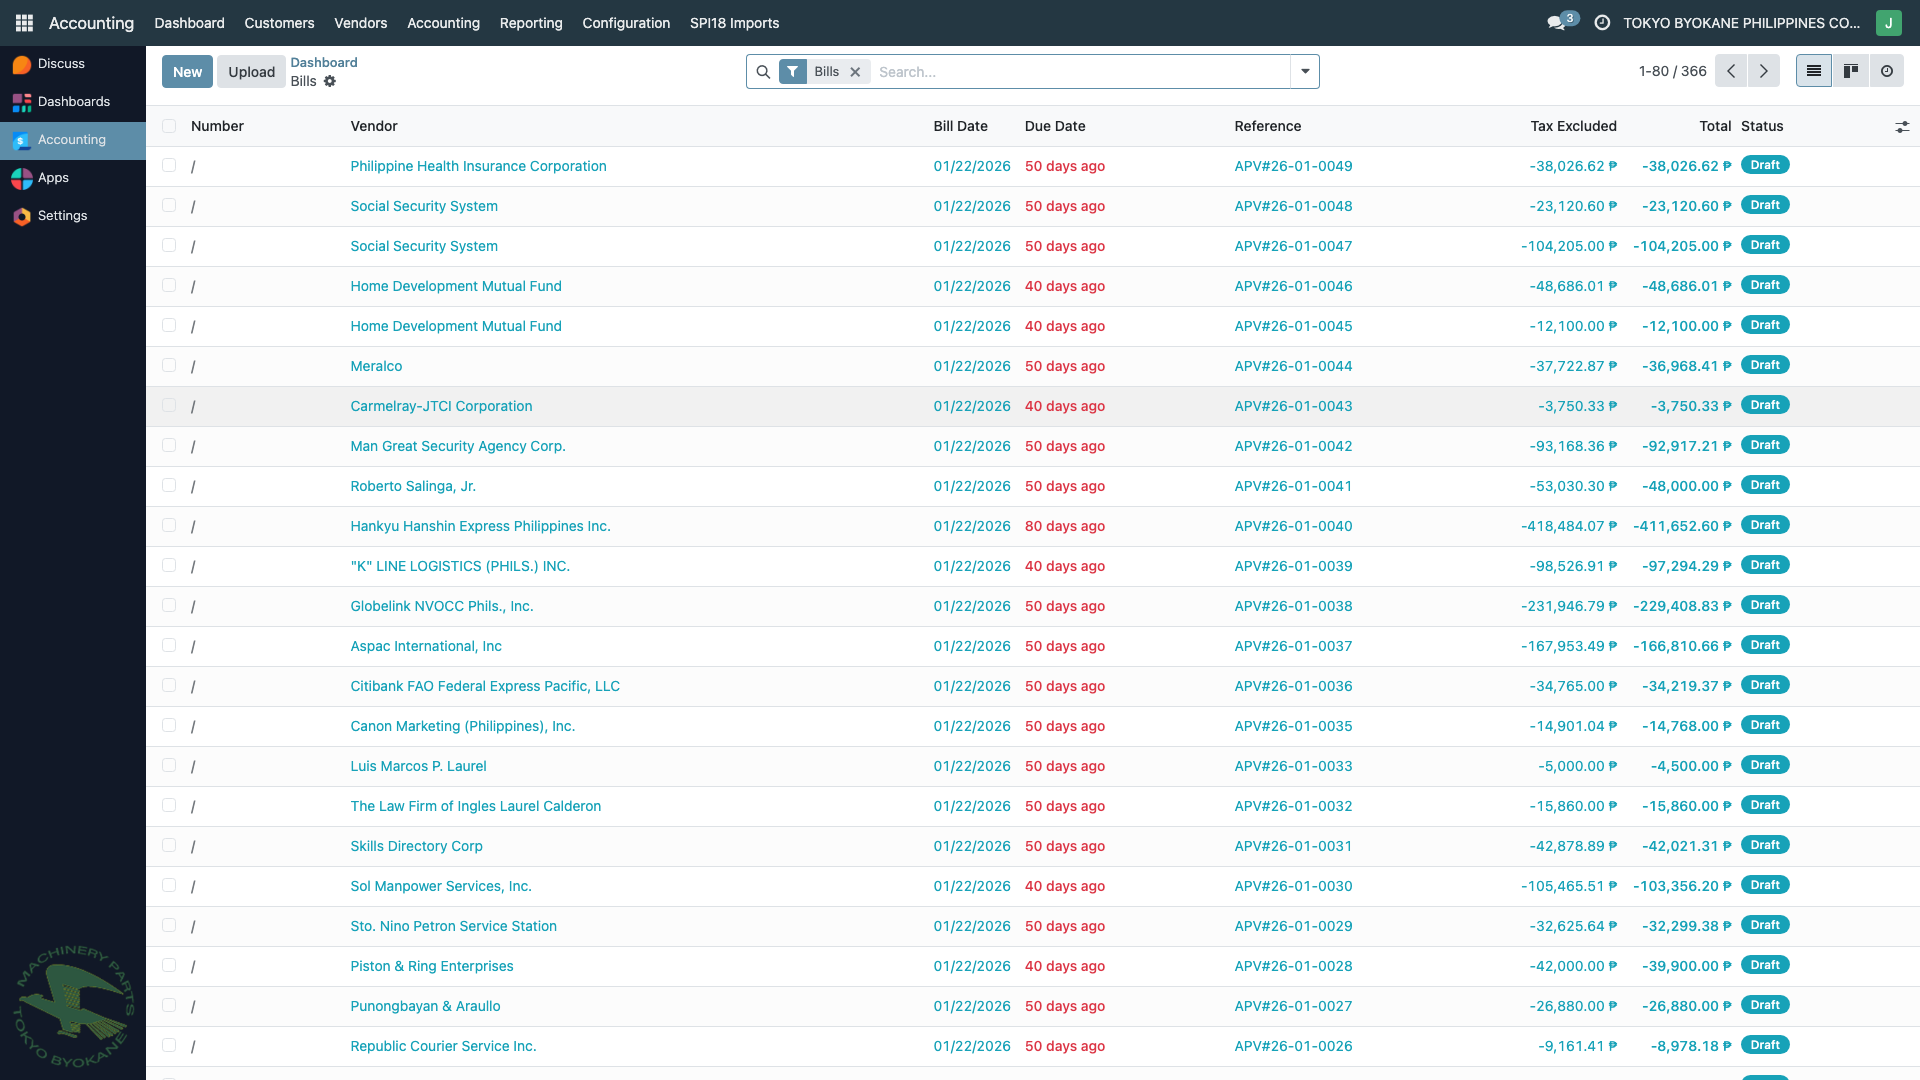
From this list you can:
- Click New to create a new bill
- Click any existing bill to open it
- Use the search/filter bar to find specific bills
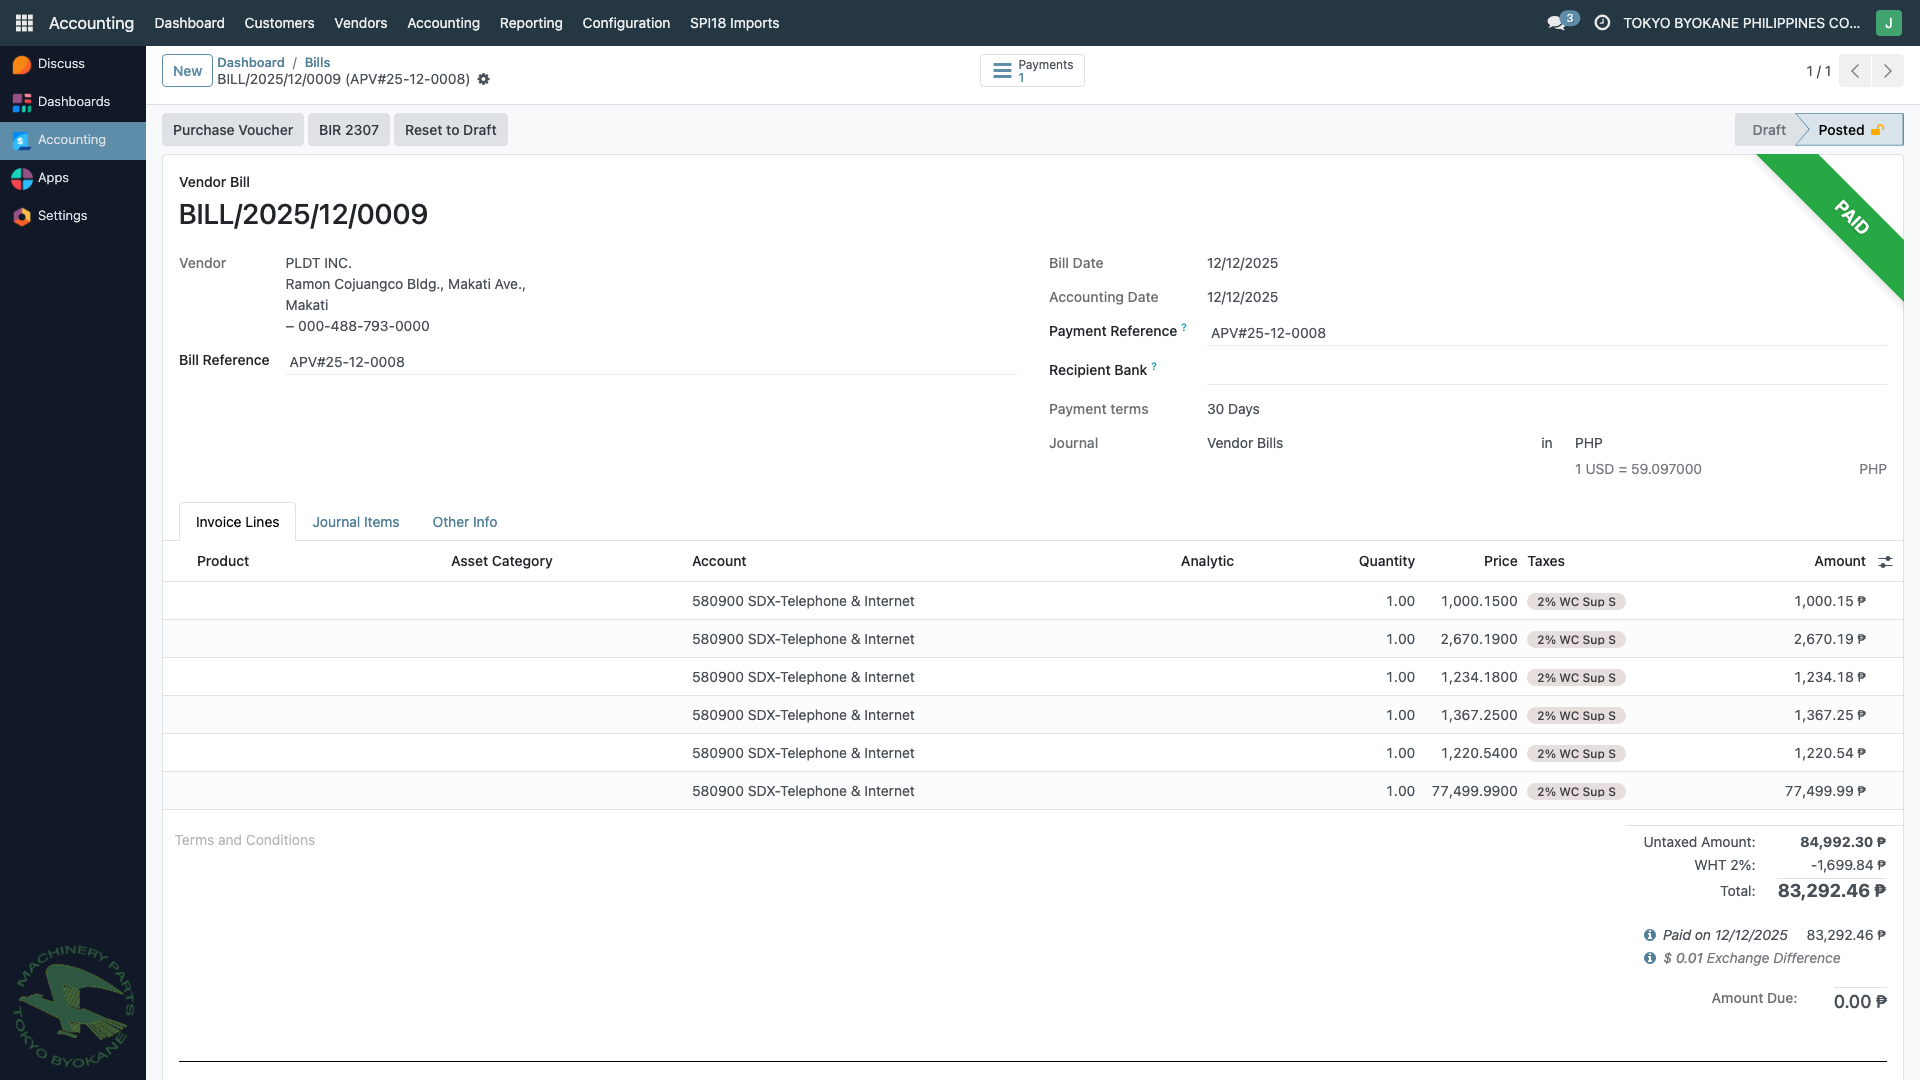
Creating a New Bill
Click New and fill in the bill header fields:
| Field | Description |
|---|---|
| Vendor | Select the vendor from the dropdown (must have TIN on file) |
| Bill Reference | The vendor's invoice/APV number |
| Bill Date | Date shown on the vendor's invoice |
| Accounting Date | Date for posting to the GL (usually same as bill date) |
| Payment Reference | Auto-generated reference for tracking |
| Payment Terms | e.g., 30 days, Immediate, etc. |
| Journal | Select "Vendor Bills" (default) |
Adding Bill Lines
For each product or service purchased:
- Click Add a line in the Invoice Lines tab
- Select a Product (or leave blank for a free-form line)
- Enter the Description (line narrative)
- Set the Quantity and Price
- Select the applicable Taxes:
- VAT Input — for input VAT (12% for VAT-registered vendors)
- Expanded Withholding Tax — e.g.,
EWT Sup 2%,EWT Contractor 2%, etc. (based on ATC)
Withholding Tax
The system automatically computes withholding tax based on the tax code you select. The withholding tax:
- Shows as a negative tax amount on the bill
- Reduces the amount you pay to the vendor
- Is tracked in the withholding tax payable account
- Will be reported on BIR Form 1601-EQ (MAP/QAP)
:::tip Choosing the Right ATC
For services: commonly EWT Sup 2% (Top Withholding Agents) or the applicable professional fee rate.
For goods: typically no withholding unless the supplier is a top withholding agent supplier.
Consult the BIR Revenue Regulations for the correct ATC.
:::
Approval Workflow
TBPC uses an internal approval workflow tracked on the bill:
- Prepared by — User who entered the bill
- Checked by — User who verified the bill details
- Approved by — User who authorized payment
These fields are visible at the bottom of the bill form and are printed on the Purchase Voucher.
Posting the Bill
Once the bill is complete and reviewed:
- Click Confirm to post the bill
- The bill status changes from Draft to Posted
- Journal entries are automatically created:
- Debit: Expense/Asset account (from line items)
- Debit: VAT Input (if applicable)
- Credit: Accounts Payable (vendor)
- Credit: Withholding Tax Payable (if applicable)
After posting, the bill is ready for:
- Purchase Voucher printing (see next page)
- BIR 2307 generation (see BIR 2307 section)
- Payment processing (see Paying a Bill)
:::info Irrevocable Posting Once posted, the bill's journal entries cannot be deleted — only reversed. If you need to make a correction, create a debit note or reverse the bill and re-enter it. :::